Appetite loss and appetite reduction are important factors in illness assessment, and they must be recognized and reported as soon as possible. Acceptance of favorite foods often determines if a pet should be hospitalized or not. A couple of off days is generally not a big problem as long as the pet maintains hydration one way or another and recovers promptly, but recurring episodes of poor appetite or slow, gradual reduction in appetite are important and frequently point to a chronic progressive illness. Nutritional support not only helps the pet recover but buys time to keep the pet stable while diagnosis and treatment are worked out. The pet must be fed in order to get well.
The term anorexia simply means eating no food. Many people get confused by the human eating disorder anorexia nervosa. When the veterinarian says the pet has anorexia, it does not mean the pet has a distorted body image; it simply means the pet is not eating.
So how do we get a pet to eat? We will review some techniques here. Be sure to check with your veterinarian regarding the proper amount of food to feed and which foods are acceptable. Eating only a few bites of food or drinking the gravy does not constitute a good appetite so when asked if your pet is eating, this isn’t really a yes or no question. Be specific about quantity.
Don’t wait for the appetite to completely disappear before seeking veterinary assistance.
Pets with a poor appetite are sick, and if you wait until the appetite is completely gone, it may be too late for recovery. This is particularly true for cats. As the appetite fades, the pet must depend on stored fat for nutrients. When large amounts of fats are mobilized to meet energy demands, they must be processed by the liver before being used for calories. The feline liver is not designed to handle large amounts of fat and will fail in a condition called hepatic lipidosis.
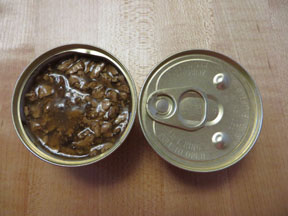
First Offer Canned Food
If you think your pet’s appetite is poor but are offering only kibbled food, your first step is to get some canned food and offer that. Most animals find canned diets far more palatable than dry foods, and you may find that this step alone fully alleviates the problem. There is a misconception that canned food is somehow of poor nutritional quality. In fact, canned food and dry food differ primarily in their water content and, thus in texture. If you consider the food without water, the unprepared diet is basically a powdered meat mix similar to a flour.
It can be baked into a kibble or steamed into a canned food. Canned foods differ in quality just as dry foods do. See if the pet will eat a canned food or a mixture of dry and canned food. Adding a flavored broth or cooked egg is also helpful in enticing the pet to eat a kibbled diet.
Second, Offer a Delicacy
Foods that are generally regarded as delicacies among pets include canned chicken, cooked egg, and canned tuna. Therapeutic recovery formula diets are generally well accepted.
With the exception of the recovery diets, these treats are not nutritionally complete but can make a good jump starter for pets. A pet who has not been eating may feel continued discomfort until eating begins again. Something tasty may be necessary to get the appetite restarted.
Do not simply put the food in a dish in front of your pet. Instead, rub a small amount on the teeth or spoon a little in the mouth so that the pet can get a taste. Don’t be surprised if he spits it out; we are just trying to get the taste of the food in his mouth. Hold the bowl up to the pet’s nose so that the aroma is inescapable. You may find that coaxing in this way gets the appetite started.
A Note on Gourmet Cat Foods (Yes, Dogs Eat Them, too)
Several “extra tasty” products available in the grocery store can be really helpful in tempting a pet with a poor appetite. Fancy Feast by Purina comes in numerous textures and flavors, each can containing approximately 100 calories. The diet is complete and balanced for cats and is often a good appetite jump starter. Temptations®, by Mars Petcare, are especially well-accepted treats made for cats. Because many cats will not eat anything else, they have been balanced to be nutritionally complete for cats and can be used as a cat’s sole diet if necessary.
A Note on Starting Prescription Diets
If the pet is supposed to eat a prescription diet but refuses, do not attempt to starve the pet into eating the prescription food.
Many prescription diets are relatively bland and pets do not wish to eat them, particularly if they are used to eating large amounts of table scraps (always a bad practice) or a more flavorful regular food. Starving the pet will only make him sicker. Try a gradual change from the regular food to the new food over a week or so. If the pet simply will not accept the new food, be sure to let your veterinarian know this. There may be an alternative flavor to try; further, prescription diets are guaranteed by the manufacturer meaning you can get a full refund on the bag or case if the pet does not accept the food. Sometimes it is necessary to forgo the therapeutic aspect of the special diet just to get the pet to eat, but your veterinarian will help you with these guidelines.
Provide Privacy
Be sure other pets at home do not bully or distract the sick pet. In a multi-pet home, it may be difficult for the sickly or elderly pet to eat without the younger pets taking his food. Many animals wish to eat at their leisure, particularly if they do not feel well. Consider giving your pet a private area and her own dish. Never feed multiple pets from the same bowl as one is sure to get the lion’s share of the food to the other’s disadvantage.
Many pets like to eat overnight when no one is watching.
Medical Assistance
Appetite-stimulating medications are available.
There are several products available that can create a sense of hunger:
Capromorelin: This is an oral liquid that mimics the body’s natural system that generates the sense of hunger. It is best given daily rather than only on bad days. Capromorelin is available in both a canine and a feline formula.
Mirtazapine: This is a pill originally developed as an anti-depressant for humans but was found to have appetite increase as a side effect. It is available as a tablet, typically given daily for dogs or every two to three days for cats, or as a transdermal gel for cats which is applied daily to the inner surface of the ear.
Cyproheptadine: This is a psychoactive anti-histamine that has an appetite stimulation side effect. It is available as a pill and is typically used twice daily.
Prednisolone/Prednisone: This hormonal anti-inflammatory has a number of uses in the treatment of immune mediated conditions, inflammatory conditions, cancer therapy and many other situations. One of its side effects is increased appetite and it is sometimes used for this effect, though because it affects so many body systems, it is generally not used for its appetite effect alone.
These medications represent non-invasive ways to medically improve appetite.
Assisted Feeding
Non-invasive methods are all well and good but the bottom line is that an animal that does not eat will get sicker and ultimately die. Receiving nutrients is the basis of recovery and one cannot simply wait around for days for medications to work. Nutrients must be delivered ideally in a way that is not stressful for either the pet or the human caretaker.
Feeding Tubes
Feeding tubes are the least stressful method of delivering nutrition and can be placed through the nose, throat, directly into the stomach or into the intestine. Liquid diets are delivered through the tube, usually with no resistance from the patient whatsoever since the mouth and face are not manipulated.
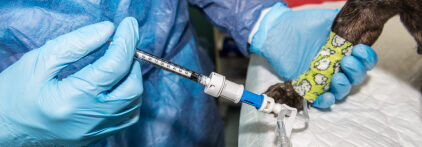
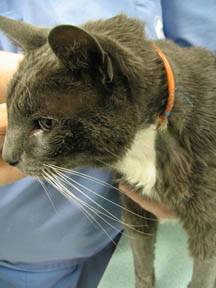
Gaining in popularity is the esophagostomy or E tube. This tube is placed in the esophagus via an incision in the side of the neck. A bandage or special cloth collar may be used to hold it in place though many patients do not require a wrap of any kind. The placement procedure is fairly short, and the tube is comfortable for the pet. Protective cone collars are not generally needed and the pet can go about his or her life with the tube in place.
The larger size of the tube allows for blenderized diets which can be prepared at home for less expense than prepared liquid diets. Feeding does not require fussing with the pet’s face and thus is more comfortable. Bandages must be kept clean around the area, and tubes must be kept in place for a minimum amount of time to allow for proper scar tissue to form, sealing the feeding hole to the outer tissue. When the time comes, the tube can be pulled, and the hole seals up. These kinds of tubes require brief surgical placement, and thus anesthetic risks apply.
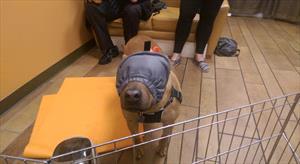
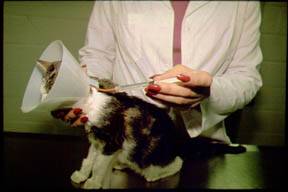
Nasogastric tubes (N-G) that go through the nose require no anesthesia to place but do require an Elizabethan collar to prevent the pet from yanking the tube out. They can accommodate only a liquid diet because of their small diameter and are difficult to manage at home. Most animals will not want a piece of equipment attached to their face and will try to remove it. N-G tubes are best used for patients that are too sick to try to pull out the tube. Alternatively, they can be placed for the feeding process and then removed.
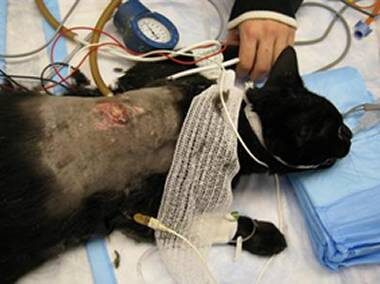
Feeding tubes can similarly be placed in the stomach (G-tube) and protrude from a belly bandage. The G-tube has all the advantages of the E-tube and is favored by some doctors. Again, the tube diameter is large enough to accommodate a slurry rather than a liquid, and the tube is comfortable to wear and use. A brief surgery under general anesthesia is required to place the tube.
Syringe or Force Feeding
In the past, syringe or force-feeding was used in an effort to get calories into a pet. There are several disadvantages to this technique and no advantages. First, the pet is not going to like it, and there will be struggling, stress, and mess. The pet may be too sick to withstand stressful feedings, and creating ongoing unpleasant feeding experiences can result in what is called “food aversion,” where the pet may not ever have a normal appetite again.
Feeding too quickly can lead to choking or food aspiration if the feeder is too aggressive. Talk with your veterinarian before using this method, as it can be detrimental to your pet.
Nutritional support is essential to proper recovery and it is important to realize that there are several techniques available to see that the pet does not suffer extra debilitation from malnourishment. If you think your pet has a problem with weight loss or inadequate appetite, do not wait until the problem is extreme; see your veterinarian promptly.