Histopathology is the microscopic examination of stained tissues to look for a potential cause or the size of a diseased area. Staining is the process that applies dyes to the slide to highlight cells and make them easier to see.
What Is a Biopsy?
A biopsy is the removal and/or examination of cells or tissue from the body to figure out a disease’s presence, cause, or extent.
Benefits of Histopathology
Histopathology can be a powerful diagnostic tool. There are many diseases that cause vague and nonspecific clinical signs. The results of histopathology can help your veterinarian know the specific disease your pet is suffering from and the required treatment.
In some cases, histopathology is the only way to find out for sure what condition your pet may have. Many diseases require histopathology to be confirmed. Some of these are various inflammatory, congenital (a condition existing from birth), and cancerous diseases.
Examples of inflammatory diseases that require histopathology to be diagnosed include inflammatory bowel disease, glomerulonephritis (inflammation of the glomeruli, which are part of the kidneys), and hepatitis (inflammation of the liver).
Unusual or severe skin abnormalities are instances when your veterinarian may initially recommend histopathology when making a diagnosis. Histopathology can be useful in a pet who isn’t displaying obvious signs of sickness. Some veterinarians may recommend taking biopsies of masses based on their size, location, duration, appearance, or if seemingly painful.
Cancer is a type of disease that often requires histopathology for diagnosis. Histopathology is often needed to correctly identify the mass as cancerous or not. This identification is important for detecting your pet’s cancer and deciding the best treatment plan.
Biopsy Procedure
A tissue biopsy is obtained by removing a small piece of tissue. How that tissue is taken depends on the type of tissue and where that tissue is located.
Some methods of obtaining a biopsy do not require invasive surgery. Your pet may only need local anesthesia (numbing the area) and sedation in these cases. For example some skin lesions are often investigated with a simple skin punch biopsy.
Other biopsy methods may require general anesthesia, where your pet is “put under” and unconscious for the procedure. This option is usually for larger superficial masses or internal biopsies, like those of the intestines, and may involve the use of an endoscope (a small camera on a long flexible wand to see within the body) or exploratory surgery, where a body cavity like the chest or abdomen is opened to look for masses or other abnormalities.
Your veterinarian will explain how they will get a biopsy sample and decide whether your pet is stable enough to undergo general anesthesia if needed. Depending on the procedure, your veterinarian may also refer you to a veterinary specialist to obtain the biopsy and to help recommend further treatment.
Once a biopsy is obtained, it is sent out to a pathologist. A veterinary pathologist will examine or “read,” the tissue sample and report their findings. In most cases, the biopsy sample will take some time to ship to a laboratory and to be evaluated. Your veterinarian will give you an estimate of when to expect results.
Recovery
Your pet will have a wound where the tissue was removed and may have stitches. Your veterinarian should provide you with post-surgical instructions and may provide pain relief medications as needed.
The biopsy site needs to be kept clean and dry; your pet should not be able to lick it or irritate the wound. Your veterinarian may recommend an Elizabethan collar (cone) to help prevent your pet from touching it. If you have questions at any time about how your pet is healing, always contact your veterinarian.
Limitations of Histopathology
While histopathology can provide valuable information, it has limitations too. It helps your vet to find the diagnosis most of the time. Errors can happen when tissue sampling is not good enough (e.g., the biopsy was not representative of the affected area) or if there is a lack of clinical history. Your veterinarian can prevent many of these errors by collecting and handling the tissue appropriately and working closely with the pathologist.
Your veterinarian may request a second opinion on the biopsy if the results come back inconclusive or are unexpected, and they may recommend repeating a biopsy. Depending on the disease, more specialized lab tests may be needed, including genetic and immunology testing.
Histopathology is not always needed or recommended. It should only be pursued if your pet is stable enough to undergo the procedure needed to obtain the biopsy, if the results will affect the treatment plan, and if you are willing to pursue treatment.
If your veterinarian has a high suspicion for a specific disease, they may recommend treatment without a definitive diagnosis. This can resolve your pet’s problem without the need for a biopsy. However, a biopsy may be needed if your pet does not respond well to the treatment.
Not all lumps and bumps require histopathology; some may be able to be diagnosed with a less invasive test called cytology, which involves taking cells from a mass or affected organ with a needle (a fine needle biopsy), a sample of a body fluid, or a washing, brushing, scraping or swab collection. If there is low suspicion for disease, your pet is not showing discomfort associated with an abnormality, or a mass is small, your veterinarian may recommend cautious monitoring.
Results of Histopathology
Your veterinarian will let you know when your pet’s histopathology report comes back from the pathologist, and will then discuss potential next steps with you. While the results may not always be good news, knowing exactly what is affecting your pet is one step towards ensuring they receive the best treatment and care. Hopefully, with the right information, you can help your pet be as healthy as possible.
The guinea pig, or cavy, is a rodent native to the Andes Mountain area of South America. They were first domesticated by the Andean Indians of Peru who used them as a food source and as a sacrificial offering to Incan gods. During the 16th century, Dutch explorers introduced guinea pigs to Europe where they were selectively bred by fanciers. The guinea pig entered the research laboratory in the 18th century and have since made significant contributions to the scientific community.
Although often considered a children’s pet, guinea pigs do require good attention to hygiene and have specific dietary requirements to maintain health. The more time an owner is willing to invest in a guinea pig, the more its true personality will shine through. Many guinea pigs are now kept indoors, spending considerable amounts of time interacting with their owners.
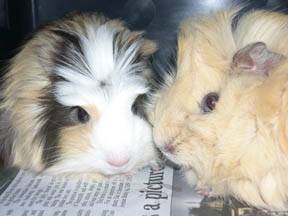
Through selective breeding efforts, guinea pigs are found in an array of colors and coat types from which to choose. Four primary varieties are commonly encountered in the pet industry. The Shorthair or English is characterized by having a uniformly short hair coat. The Abyssinian has whorls or rosettes in their short, rough, wiry coat. The Silky is a large variety distinguished by its medium length silky hair. The Peruvian is recognized by its long, silky hair. All types are commonly kept as pets.
Guinea pigs generally live about five to seven years. Larger than other rodents, the adult average weight ranges from 900 to 1200 grams (2 to 2.6 pounds).
Diet
Like many animals, guinea pigs determine early in life what foods they prefer, based on their eating experiences. This is why it is a good idea to gradually expose young guinea pigs to a variety of foods once they are weaned so later they will have a broader range of food choices.
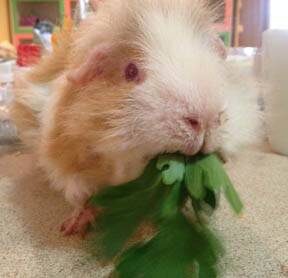
Guinea pigs are herbivores and in their natural biology grasses are the most prominent part of their diet. Grasses are abrasive to teeth, which is why the guinea pig evolved with both incisors (front teeth) and cheek teeth that grow continuously throughout life.
Good quality grass hay should be available at ALL times, and should compose at least 80 percent of the guinea pig’s diet. Any grass hay is sufficient, including timothy, orchard grass brome and others. Many guinea pigs prefer one variety of grass hay over others. Avoid the use of alfalfa, which is not a grass but rather a legume (like peas and beans) and is generally too high in calories (which can lead to a tubby little pig) and calcium for the average pet guinea pig’s dietary needs. Excess dietary calcium can predispose to bladder stones. Alfalfa hay, can however, be used with nursing or young growing guinea pigs for the time in which their nutritional needs are higher. Grasses also provide a variety of nutrients as well as indigestible fiber, which keeps the intestinal tract moving along at a normal speed, and digestible fiber that is used by the bacteria in the large cecum to produce such things as vitamin B and amino acids, which are used by the guinea pig. Guinea pigs with a high fibre intake are much more resistant to gastrointestinal upset.
Like primates (including humans), guinea pigs do not produce their own vitamin C. Vitamin C deficiency leads to scurvy, the symptoms of which include poor appetite, swollen, painful joints and ribs, reluctance to move, poor bone and teeth development, and spontaneous bleeding especially from the gums, into joints, and in muscle. If left untreated, this disease can be fatal especially to rapidly growing young and pregnant females. In addition, subclinical deficiencies often predispose animals to other diseases.
Fortunately it is easy to provide your guinea pig with adequate vitamin C through food, aiming to give between 10 and 25 mg (0.35 to 0.88 oz) vitamin C daily. The following chart gives examples of the quantity of various required to meet maintenance.
The volumes listed in this table are given as grams because of the small sizes.
Food source
Mg of vitamin C per 100 gram food source
Grams of food source required for:
Maintenance @ 25 mg/day (0.88 oz)
Stressed (sick or pregnant) @ 50 mg/day (1.76 oz)
Vitamin C Deficient @ 100 mg/day (3.5 oz)
Parsley
131.9
18.95
37.9
75.8
Kale
120
20.83
41.67
83.33
Kiwifruit
95
26.32
52.63
105.26
Broccoli
90.5
30.54
61.07
122.14
Brussel sprouts
86
29.08
58.17
116.34
Peas (podded)
59.54
41.98
83.97
167.95
Strawberries
59.2
42.17
84.33
168.66
Oranges
53.9
46.38
92.76
185.51
Pineapple
47.8
52.3
104.6
209.21
Chinese cabbage (pak choi)
45
55.6
111.21
222.41
Peas (green)
41.2
60.73
121.46
242.91
Beet greens
30.3
82.48
164.96
329.91
Mango
28.4
88.03
176.06
352.11
Spinach
28.4
87.97
175.94
351.88
Coriander leaves
27.3
91.57
183.13
366.27
Raspberries
26.5
94.25
188.49
376.98
Lettuce (cos)
23.9
104.45
208.92
417.85
Blackberries
21.2
117.83
235.66
471.31
Turnip
20.8
120
240
480
Basil – fresh
18.2
137.29
274.58
549.17
Melon (honeydew)
17.9
140
280
560
Squash (zucchini)
17.85
140.08
280.15
560.3
Parsnip
17.46
143.17
286.34
527.69
Radish
14.7
170.27
340.54
681.08
Cranberries
13.1
190.31
380.62
761.25
Tomatoes
12.6
198.3
396.6
793.2
Beans – snap
12.3
203.05
406.09
812.18
Grapes
11.2
222.93
445.86
891.72
Blueberries
9.4
264.71
529.41
1058.82
Plums
9.4
265.7
531.4
1062.8
Pumpkin
9.1
274.57
549.13
1098.27
Bananas
8.9
280.61
561.22
1122.45
Watermelon
8.2
305.56
611.11
1222.22
Alfalfa
8
301.12
602.24
1204.48
Cherries (sweet)
6.9
360.36
720.72
1441.44
Corn
6.6
379.75
759.49
1518.99
Peaches
6.5
384.62
769.23
1538.46
Carrots
6
416.67
833.33
1666.67
Asparagus
5.6
446.43
892.86
1785.71
Nectarine
5.3
467.48
934.96
1869.92
Apples with skin
5
533.71
1067.42
2134.83
Pears
4.2
590.28
1180.56
2361.11
Bean – Fava (in pod)
3.8
654.76
1309.52
2619.047
Celery
3.1
811.86
1623.71
3247.42
Lettuce (Iceburg)
2.8
887.5
1775
3550
Cucumber
2.3
895.72
1791.44
3582.89
The total amount of fresh foods given in a day should be around one-quarter to one-half cup (torn or shredded and packed in the measuring container), so the above chart should be used to select foods with concentrated vitamin C. When testing out new fresh foods, add one every three to four days to allow the intestinal tract to adjust and give a fair trial to see if the guinea pig will eat it.
Guinea pig pellets can be given to your pet in limited quantities. Please use guinea pig pellets, which have additional vitamin C, and not rabbit pellets. Read the label and use a brand that is grass-hay based and not alfalfa based, if at all possible. Also look at the date that the food was produced and try to buy food that is no more than 3 months (90 days) past that date. If the food is too old, the vitamin C levels will have decreased dramatically. Watch your little friend’s weight carefully and adjust the pellet amounts downward if there is too much weight gain.
Food is not just something we put in our bodies for nutrients, but it is also an environmental enrichment. The sight, smell, taste, and texture of food is mentally stimulating to all animals. Even the sound of the food preparation provides a joyful anticipation. Many a guinea pig care provider knows the sound of a guinea pig squealing with delight whenever the refrigerator door opens! Try putting the hay or fresh food in places such as hidden in little crumpled bits of paper, empty toilet paper or sections of paper towel rolls or non-toxic baskets just for fun! Try putting pellets in a small hollow plastic ball with small holes drilled in the side that are slightly larger than a pellet; as the pig rolls it around with his nose, he will get to eat in the process! The hay can be provided in a hay feeder or put in the corner of the cage. Even better, put it in an “edible” basket or cardboard box for more fun!
Foods to completely avoid are the high starch foods such as peas, beans, corn, nuts, cakes, cookies, cereal, grains, breads, and so on. These foods can create a serious imbalance in the normal bacteria in the intestinal tract and lead to potentially fatal disease. Although very small amounts of these foods can tolerated, guinea pigs can get “addicted” to them to the point they don’t want to eat healthier foods. Therefore, it is best to just avoid them all together.
And let us not forget water, which is vital to good health. Fresh, clean water should always be available either in a sipper bottle or a heavy crock that prevents spillage. Guinea pigs like to play with their water bottles, so make sure you check the bedding under the bottle for moisture and change it frequently. Sipper bottles will need to have the nipple regularly checked for adequate function, and cleaned to ensure good hygiene. Do not add any medications or vitamins to the water as it will change the taste and your guinea pig may not drink as much. Not drinking enough water can lead to chronic dehydration and potentially diseases such as kidney disease and kidney or bladder stones.
Diseases
Bacterial Enteritis
A number of bacteria are capable of causing infections of the gastrointestinal tract in guinea pigs. Some of these bacteria are introduced through contaminated greens or vegetables or in contaminated water. One of the most common bacteria that causes intestinal disease in guinea pigs is Salmonella spp. Other bacterial species that may cause diarrhea and enteritis are Yersinia pseudotuberculosis, E. coli, Arizona spp., and Clostridium spp. In addition to diarrhea, other common symptoms associated with intestinal disease are lethargy and weight loss. In other cases, sudden death may occur before theses signs are seen.
A veterinarian may elect to use aggressive antibiotic therapy and supportive care to treat this condition. A bacterial culture of the patient’s stool with antibiotic sensitivity will greatly assist the veterinarian in choosing an appropriate antibiotic.
Bacterial Pododermatitis (Bumblefoot)
Severe footpad infections are common among guinea pigs housed on poor substrate, especially cages with wire flooring. Poor hygiene, including fecal soiling, makes the problem bigger. Symptoms of this condition include swelling of the affected feet, lameness, and reluctance to move. Sometimes the guinea pigs are so used to the chronic pain that they do not seem overly affected but this is not the case. Improved sanitation and better substrate are the initial steps in correcting the problem. In addition, the feet themselves should be treated by a veterinarian. Topical dressing with an and periodic bandaging is often required. Depending on the severity of the damage, oral antibiotics may also be necessary. Pain relief is usually needed. Therapy may have to be carried out for a lengthy period of time to get full recovery. Unfortunately, a consequence of this condition is arthritis. Severe cases can even have bone infection, which is very serious.
Fur Loss
Fur loss is a common problem in guinea pigs. Hair loss or hair thinning can occur for a number of reasons. It is common among sows with cystic ovarian disease, or those that are repeatedly bred. Weakened, newly weaned juvenile guinea pigs can also be affected. Fur loss problems are also seen with certain fungal diseases and external parasite infestations. In some groups, barbering (removing hair) of subordinate pigs by dominant ones can happen.
Lice and mites are the most common external parasites of guinea pigs. Mites are microscopic, spider-like organisms that infest the top layers of the skin in affected animals. Mite infestations are usually more severe than lice. A specific mite, Trixacarus cavie, causes serious infestations in pet guinea pigs. This sarcoptic mite lives in the outer layers of skin causing an intense itching and scratching with considerable hair loss. In some cases, they don’t itch or scratch but only have hair loss and crusting of the skin. In other cases, the infestation and irritation is so severe that the pet causes significant self-inflicted wounds, and can even seizure with handling.
A veterinarian can diagnose this mite infestation by performing skin scrapings of affected areas and viewing them under the microscope. There are several treatment options, ranging from pills to injectable to topical medication. Your veterinarian will prescribe an appropriate one for your situation. In the meantime, if wood shavings are used as bedding or litter, it should be replaced with paper toweling to reduce handling of your pig and make the enclosure soft and comfortable. Ensure adequate vitamin C levels in the diet. Trixacarus cavie mites can be zoonotic.
Lice are tiny, wingless, flattened insects that live within the hair coats of infested animals. Both adults and eggs are found attached to hair shafts of affected pets. Lice infestations often go unnoticed. However, heavy infestations are usually accompanied with excessive itching, scratching, and some hair loss. Scabbing on or around the ears may also be evident. Guinea pigs are parasitized by two types of biting lice. Both irritate and abrade the skin’s surface and feed off the bodily fluids that exude through the superficial wounds they create.
A veterinarian can confirm the diagnosis of lice infestation by examining the hair coat as well as microscopic examination of hairs from affected animals. Treatment is usually in the form of an insecticidal shampoo that is prescribed by the veterinarian.
Lice transmission occurs through direct contact with infested guinea pigs. Therefore, pet guinea pigs are not likely to have this parasite unless they had previous exposure to lice-infested guinea pigs. For your pet’s sake, be sure that any guinea pig she comes in contact with is healthy, and free of this and other parasites.
Fungal skin disease is common, and is seen as a scaly, furless area that is usually circular. It can be diagnosed with a fungal culture. Treatment involves topical and/or oral medication, as well as decontamination of the environment. This condition can affect humans as well.
Heat Stress (Stroke)
Guinea pigs are quite susceptible to heat stroke, particularly those that are overweight and/or heavily furred. Environmental temperatures above 85⁰F, high humidity above 70 percent, inadequate shade and ventilation, overcrowding, and other stresses are additional predisposing problems.
Signs of heat stroke include panting, slobbering, weakness, reluctance to move, convulsions, and ultimately, death. This is a treatable condition if recognized early. Heat-stressed guinea pigs should be misted with cool (but not cold) water, bathed in cool (again, not cold) water, or have rubbing alcohol applied to its footpads. Once this first aid measure is accomplished, veterinary assistance should be sought.
Prevention of heat stroke involves providing adequate shade and proper ventilation. In addition, a cool misting of water and/or a fan operating over a container of ice can be directed toward the pet’s cage. If indoors, air conditioning during the heat of the summer provides the best relief.
Pneumonia
Pneumonia is one of the most common diseases of pet guinea pigs, and is usually bacterial in origin. Respiratory infections are caused by a number of viral and bacterial agents including Streptococcal pneumoniae, Bordetella bronchiseptica, and a gram-positive diplococcus. Many of the disease-causing organisms inhabit the respiratory tracts of clinically normal guinea pigs. Conditions of stress, inadequate diet, and improper husbandry will often predispose a pet to an opportunistic infection with one or more of these agents. Symptoms of pneumonia may include difficulty breathing (dyspnea), discharge from the nose and eyes, lethargy, and lack of appetite. In some cases, sudden death will occur without any of these signs.
Occasionally, middle or inner ear infections accompany respiratory disease in guinea pigs. Additional symptoms in these cases include incoordination, twisting of the neck (torticollis), circling to one side, and rolling.
Veterinary consultation should be sought when a guinea pig exhibits any of the above symptoms. Diagnostic testing may include radiographs and bacterial culture, depending on the situation. Aggressive antibiotic therapy in addition to supportive care of the patient may be necessary to get the condition under control.
Scurvy (Vitamin C Deficiency) See diet section above.
Slobbers / Dental Malocclusion
Slobbers is the condition where the fur under the jaw and down the neck remains wet from the constant drooling of saliva. The primary cause for this condition is overgrowth of the guinea pig’s cheek teeth, leading to spurring, tongue entrapment and malalignment. One likely cause of dental disease is insufficient hay in the diet, leading to insufficient wearing of the teeth, and increase in occlusal pressure and penetration of the tooth roots into the bone. This results in bowing of the tooth roots, which causes an abnormal angle of growth eventually leading to teeth that grow out of apposition and cause spurring and tongue entrapment. Any condition that results in pain on chewing (vitamin C deficiency, middle ear infection, eye problems are some examples) end up causing tooth elongation and following the above pattern. Satin pig osteodystrophy is strongly linked to the development of dental disease. A likely emerging cause of dental pathology is rickets, or vitamin D deficiency, in pigs kept predominantly indoors. Softening of the bones causes inappropriate wearing of the teeth, again leading to the above mentioned problems.
A veterinarian must be consulted as soon as this condition is suspected. The diagnosis is confirmed by visual examination of the mouth, although sometimes sedation to examine the teeth fully is required. Radiographs are always required to diagnose underlying issues. Correction of the problem involves general anaesthesia to correct the inappropriate length of the teeth, as well as addressing spurring and tongue entrapment issues. Predisposing causes must always be corrected, and post-operative analgesia is a necessity, as is supportive feeding until the pig is able to eat on its own.
Many guinea pigs with slobbers are emaciated, have aspiration pneumonia and gut stasis, so are in a very weakened state by the time they see the veterinarian. The prognosis can be poor in these cases.
There is no permanent solution or correction to this problem. Periodic trimming or filing of the teeth is almost always necessary, and many guinea pigs need to be on constant analgesia. Guinea pigs with this problem should not be bred since dental malocclusion is often hereditary.
Handling
The Guinea pig’s natural curiosity and friendly disposition makes it fairly easy to handle. Most Guinea pigs will approach a hand introduced into their cage and can be easily scooped into the palm of the hand. Usually, cupping one hand under the rump while the other hand cradles the midsection is a good way to pick up guinea pigs safely. Two hands are recommended so that nothing is left dangling (they’re larger than most of the other pocket pets) and because there is less risk of dropping them. Guinea pigs are quite nose-heavy, and often land on their incisors when dropped. Guinea pigs not accustomed to being handled may jump and run, but are rarely aggressive. However, some guinea pigs will bite when handled.
Housing
Housing accommodations provided for pet guinea pigs are limited only by one’s imagination, ingenuity, and budget. There is no single correct way to house your guinea pig as long as the well-being of your pet is considered. Adequate housing is a major factor in the maintenance of healthy pets.
Guinea pigs can be housed within enclosures made of a variety of materials. It is important that the flooring is not abrasive, so that the chances of pododermatitis are reduced. Broken legs are common in guinea pigs that fall through wire mesh and panic to escape. Although solid flooring requires more effort to keep sanitary, it is safer for the guinea pig. Solid floored cages also tend to be more aesthetically pleasing when appropriate bedding is used.
Bedding materials must be clean, non-toxic, absorbent, relatively dust-free, and easy to replace. Acceptable beddings are wood shavings, shredded paper, processed ground corn cob, and commercial pellets. Make sure the ground corn cob is properly processed and stored to reduce fungal spore problems. Cedar shavings have been associated with causing respiratory difficulty and liver disease in some guinea pigs, and thus should not be used. Saw dust should also be avoided since it tends to accumulate within the external genitalia of male guinea pigs, causing an impaction.
Good ventilation is also important, so most cages have wire on the sides and top to allow this. Wood should not be used due to difficulty in cleaning and susceptibility to destructive gnawing. The design and construction of the enclosure must be escape-proof. In addition, the cage must be free of sharp edges and other potential hazards. The size of the enclosure should allow for normal guinea pig activity. Approximately 100 square inches of floor area per adult guinea pig is recommended. Breeding animals should be provided 180 square inches each. The enclosure can remain opened on the top if the sides are at least 10 inches high (as long as other family pets such as dogs or cats are not a threat).
The environment in the vicinity of the pet’s cage is another important consideration. Because of their sensitive nature, guinea pigs are more comfortable and relaxed when housed in a quiet spot away from noise, excitement, and other such stresses. Also be sure to select a location away from direct sunlight and avoid cold damp areas. Guinea pigs thrive in a dry, cool environment with adequate ventilation. Drastic environmental changes should be prevented (especially high temperatures and humidity). Since they are active at night (nocturnal), guinea pigs require quiet periods of light in order to rest.
Guinea pigs are social creatures, and derive considerable comfort from being able to lean against each other; this is called being thigmotactic. Guinea pigs should therefore be kept in groups of at least two. Pigs kept together since youth are likely to live harmoniously, however, guinea pig relationships can deteriorate and sometimes previously harmonious animals may need to be separated. Castrated males often live well with one or two females although intact males will often fight in the presence of a female.
Reproduction
The single most important consideration regarding guinea pig breeding is that the female guinea pig (sow) should be bred between four and seven months of age if she destined for breeding. If the first breeding is delayed much beyond this time, there is concern that the pubic symphysis may fuse, which can lead to serious problems with delivery. Males (boars) should be at least four months of age before breeding.
The sow’s estrus cycle (‘heat’) lasts 14 to 19 days.
The actual period in which the sow is receptive to the boar for breeding is approximately eight to fifteen hours during this cycle. Sows often return to ‘heat’ within a few hours after giving birth. This time is known as ‘postpartum estrous’ which means that she can be nursing one litter while being pregnant with another.
Pregnancy lasts between 63 and 70 days. The gestation is shorter with larger litters and longer with small litters. This duration of pregnancy is relatively long when compared to other rodents.
Pregnant sows exhibit a grossly enlarged abdomen during the later stages of pregnancy. Her body weight may actually double during pregnancy. The time of delivery is difficult to assess in guinea pigs due to the relatively long gestation period and lack of nest building by the sow. Within one week prior to delivery, a slight widening of the pelvic area can be noted. If this separation of the pelvis does not occur, then it can cause the delivery problems mentioned previously. Therefore, sows bred past seven months of age require caesarean section for delivery of the young.
An uncomplicated delivery usually takes about one-half hour with an average of five minutes between babies. Litter sizes range between one and six with an average of three to four. First time litters are usually very small. Unfortunately, abortions and stillbirths are not uncommon with guinea pigs.
The young are very well developed at birth. They weigh between 50 and 100 grams (1.75 to 3.5 ounces) and have a full hair coat. Babies are even born with teeth and open eyes. Mothers are not very maternal in the raising of the offspring in that she does not build a nest and even remains in a sitting position while nursing. The young can actually eat solid food and drink from a bowl shortly after birth, and can wean in as little as five days, but it is recommended to allow them to nurse for three weeks before weaning.
Ferrets seem to have been designed to challenge the diagnostic abilities of veterinarians. That said, a wide array of gastrointestinal (GI) disorders is seen in ferrets.
Like much of the rest of ferret medicine, GI disease is a bit of a gray area where there still is more to be learned than we actually know. That means a lot of veterinarian’s diagnoses and therapies involve some educated guesswork and good old-fashioned trial and error. Ferrets are walking GI disasters yet disease is common; nonetheless, the vast majority of cases are readily solved.
Having owned over 50 of my own ferrets through the years and treated thousands more, I am thoroughly convinced that every ferret has some diarrhea on an intermittent basis. The significance of that diarrhea depends on the severity, frequency, and overall impact on the health status of that individual patient.
Unfortunately, ferrets are blessed with an ultrashort intestinal tract and plentiful diets that are not designed with the ferret GI tract in mind, which is a recipe for severe and chronic GI disease. The transit time from end to end is only 3-4 hours, and the ferret is an obligate carnivore: they have little tolerance for the sweet treats offered by owners and the high-carbohydrate foods on the commercial market. From end to end, the ferret was designed and built to be an efficient predator, well adapted to a carnivorous lifestyle. Unfortunately, the commercialized high-carbohydrate kibbled diets are not compatible with their anatomy and physiology, and likely contribute to the extremely high incidence of GI diseases seen in pet ferrets. In large part, we do just about everything wrong when we feed our pet ferrets, and this comes to light in typical ferret fashion with chronic disease.
Perhaps the most common finding associated with GI disease in ferrets is diarrhea. Ferrets are little diarrhea machines, and since the GI tract is short, regular and severe diarrhea can rapidly lead to dehydration in as little as 3-4 hours. Not only is ferret diarrhea often frequent and profuse, it is colorful. Shades of neon green are not unusual to see, as well as bright mustard yellows, sunset reds, and black tar.
Dental Issues Relate to GI Disease
Dental disease is a nearly universal problem with older ferrets, and may be prevented by regular oral hygiene by owners. This can be challenging however, given the complete inability of most ferrets to sit still for more than a few seconds at a time, so healthy chew treats are sometimes substituted.
Ferrets have 34 permanent adult teeth. The canine teeth are designed to puncture and grip their prey. The fact that these are capable of delivering such a powerful and often fatal bite is a testament to the gentle personality of our ferrets – we rarely get treated to more than a mere nip of these strong teeth. Damage to the canines is common, particularly in animals housed for too long or too frequently in cages, as bar biting is a common result of cage frustration and can lead to fracture or breakage of these teeth. Dental pain, however, does need to be ruled in or out when working up a GI case, particularly if the ferret is not interested in eating.
In my clinical experience, it appears that ferrets fed exclusively a commercial kibbled diet often have the most severe dental disease. Those fed a balanced homemade diet combined with small amounts of kibble appear to fare better. Some dental health proponents recommend an “all prey” diet for ferrets. I do not have a large enough database of ferrets fed prey-based diets to have an opinion on this relative to dental health, but I can say that my own ferrets who ate prey for treats did have reasonably good oral health. Also, from my personal experience, the most effective dental treat appears to be N-bone Chew Treats. I have fed and recommended them for years, and believe that they do work.
However, there is no substitute for a good diet, avoiding sugary treats, and providing oral hygiene. I generally prepare owners for the eventual need for professional veterinary dental cleaning as their young ferret matures; periodontal disease can be seen by the age of 2-3 years.
The Digestive Tract and Diets
Like other carnivores, ferrets have a short digestive tract. Start to finish, the digestive tract is three to four times the length of its body, while an herbivore (such as a cow) has one greater than ten times the length of its body. Therefore, domestic ferret food only takes about 3-4 hours to digest.
This translates into a lot of poop! New ferret owners are often surprised – and dismayed – by the frequency and volume of ferret stool, but this is a normal and unavoidable byproduct of the short digestive tract. Many products supposedly reduce the odor of the fecal matter; however, my experience has been that the odor is best reduced when a high quality, non-fish-based diet is used. Strong and offensive stool odor, or changing odor, in the face of good husbandry and diet is cause for concern. I have seen a few ferrets with significant GI disease whose stool smell could outrank a skunk!
One of the arguments in favor of raw diets is that the short GI transit time helps to prevent food-borne bacteria (such as Salmonella and E. coli) from affecting the ferret, but I am not sure that there is much evidence to substantiate that claim. Additionally, ferrets with GI disease may have an altered transit time. Although from a physiological and anatomical standpoint there are strong cases to be made for a prey-based diet in ferrets, there are also risks.
I am firmly of the opinion at this point in time that we really don’t have a perfect diet available for ferrets that meets all of their anatomic and physiologic needs as well as the desires of their owners; we simply have an array of compromises to choose from. For my ferrets, I use a blend of four or five different high-quality ferret kibbled foods from several different manufacturers and several different protein sources, and hope to strike the balance through diversity.
Ferrets have a large, simple stomach, which is designed to hold a huge meal followed by a period of fasting; however, if you look at a ferret’s behavior, it will typically eat small meals frequently, like a cat does. The small intestine and entire colon are very short. The diameter of the small intestine is also small, which can cause considerable problems given the proclivity of ferrets to snack on everything rubber or foam that they find, from remote controls to kid’s toys. That short colon helps explain why diarrhea is such a common problem in ferrets!
Foreign Objects
Ferrets will get into anything and everything – so once again, don’t assume. Once my entire business of 14 ferrets got into my office (allegedly off limits) and into the top drawer of my desk (are you picturing a pyramid of ferrets right about now?). There, they managed to find a non-childproofed bottle of ibuprofen, which they chose to open and proceeded to lick all of the coating off the 70-plus tablets in the bottle. That evening we had 14 ferrets hooked up to IV fluids in my living room. The determined ferret can outsmart almost every human pet-parent around (including me). Do not underestimate the power of the ferret!
Symptoms of GI disease vary amongst ferrets and are largely non-specific. Perhaps the most common complaint, not surprisingly given their anatomy/physiology, is diarrhea. What might be surprising, though, is that the only sign for some conditions, such as foreign body ingestion, might be reduced appetite and diarrhea! This can make it challenging to your veterinarian to determine whether an animal with loose stool has a mild gastroenteritis that can be addressed symptomatically, or a more serious disease that warrants an exploratory surgery.
A common symptom of GI discomfort includes grinding their teeth (bruxism). Sometimes it will be the only sign. Individual ferrets are more or less sensitive to discomfort, and what might result in tooth grinding in one patient will not in another, making it difficult to assign importance to this finding.
Similarly difficult is the symptom of vomiting. Some ferrets are sensitive to gastric inflammation and will profusely salivate and vomit with the slightest indication of gastritis, while others will have large gastric foreign bodies and exhibit no vomiting.
When to See your Veterinarian
See your veterinarian if your ferret seems lethargic, is vomiting, has significant diarrhea, or is grinding their teeth. Those are fairly obvious signs that a ferret is not well. However, if you notice changes in appetite, stool appearance, odor, and other more subtle changes, your ferret should also see the veterinarian. Sometimes those subtle changes can be the earliest signs.
Frontline (fipronil) is labeled for the treatment of fleas, ticks, and lice on dogs and cats. Frontline has a wide margin of safety for most mammals, but rabbits are an exception. Using it on them can cause them to be sick, potentially fatally. The Frontline package insert actually contains the warning to not use the product on rabbits; nonetheless, many rabbit owners are still unaware of the risks.
Numerous reports exist of young or small rabbits that were treated with fipronil and within 24 hours exhibited signs of anorexia and lethargy, with or without seizures, or died.
Young rabbits are reported to be more sensitive to the effects of than older ones. Seizures are often not seen until 3-9 days after exposure. Death may not occur for a week or two after exposure.
In the event of known application, whether accidental or intentional, the rabbit should be treated for topical cutaneous exposure. When rabbits lick the product while grooming, they absorb 30-50% of it, compared to absorbing only 0.07% of it just from being on their skin. The rabbit should be bathed in warm water with a mild puppy/kitten shampoo, towel-dried afterwards, and then placed in a warm incubator to dry. While this could be done at home, a rabbit showing clinical signs should be at the clinic for supportive care. In addition, the use of activated charcoal may be a good idea because rabbits rapidly groom off any product applied topically, so they are likely to ingest Frontline.
By the time a rabbit is showing clinical signs, prognosis for recovery is guarded, but bathing and activated charcoal should still be attempted. Supportive care should include fluid therapy and force feeding. If the rabbit has seizures, he should be controlled with anti-seizure medications such as Valium or midazolam. If there is no improvement in the first 72 hours, then the prognosis for recovery is guarded.
Ferrets are complex little creatures and are interactive members of the household that need and value interaction with their families. They can build social and cognitive bonds similar to those we associate with dogs and cats.
Owning a ferret, especially a young kit, is much like having a puppy in the house – except they never grow up! Ferrets normally play hard and will commonly use their mouths to grab and hold things.
This mouthiness is not a form of aggression, just a normal, energetic ferret. Like puppies, ferrets need to be taught what acceptable play is and what is too rough for human skin.
The intelligent and curious nature of ferrets does not lend itself to many hours in a small cage. Although ferrets may be caged for their own safety, they do require large amounts of time out of cage to exercise, explore, and play. A minimum of 3-4 hours per day of interactive, social playtime should be provided. Ferrets are social creatures, and usually thrive in a multi-ferret household, with the number in the business (a grouping of ferrets, like a flock of sheep) determined primarily by the space and resources provided to them by their owners. Confining ferrets to a cage for 20 hours per day is similar to confining a young Lab puppy to a crate for the same period of time; it does not provide adequate room nor stimulation. Caging a ferret is similar to crate training a puppy and done often for safety purposes but not as a way of life.
Housing
Cages, if used, should be large and multi-story since ferrets enjoy climbing and having high vantage points. A rough rule of thumb is that a single ferret cage should be a minimum of 3 feet high, 3 feet wide, and 2 feet deep. As the number of ferrets increases, so must the cage size as well as the amount of out of cage time provided. In larger businesses (more than 5 animals) a small spare bedroom provides adequate space.
Caging and ferret areas should be provided with ample soft bedding for hiding, sleeping, and playing. They are usually relatively easily litter box trained (at least for the most part) and boxes should be placed in the corner of the cage where the ferret likes to go. There is no need to place recycled paper products (such as Carefresh) in the majority of the cage, unless you are unable/unwilling to litter train.
All wire footing surfaces (ramps, floors) should be covered with soft materials to prevent injury. Inspect cages for possible sources of injury as well as appropriate spacing between the bars. Just because a cage is marketed for a given species does NOT mean that it is safe or ideal for that species!
Bedding in the cage will need to be laundered several times weekly to remove the body oils and odor associated with ferrets.
Ferrets kept in clean cages and fed an appropriate diet and who are relatively healthy will have a minor amount of body odor. A smelly, greasy ferret either has an underlying health condition or a dirty cage at home. Ferrets should have access to at least one more sleeping spot than there are ferrets in the area – so three ferrets must have four sleeping spots to choose from and so on. Sleeping spots can be hammocks, sleep sacks, beds, hanging pouches, and so on. Often ferrets prefer to “pile sleep,” but should have the option to sleep solo.
Litter pans can be filled with any variety of non-edible, non-clumping, and odor-absorbing litter. My personal preference is wood stove pellets (inexpensive and safe), but a variety of commercial ferret litters are available. Ferrets produce a lot of stool, having a short digestive tract. Boxes should be scooped daily and cleaned/changed quite regularly.
Out of cage time is sometimes the most difficult time for the owner, given that ferrets are both curious and intelligent. If a ferret can get its head through something, the body can follow! Small holes around plumbing that would otherwise go unnoticed are often found by ferrets.
Most ferrets are quick to open cupboards, exposing them to items like household chemicals and other unhealthy surprises considered “locked up” by the owners. Since ferrets can also climb, they often can and will access items placed high such as windowsills, closet shelves, and counter tops.
Similarly, they can get into and under furniture items and become injured, and recliners are particularly deadly. Calls for ferrets stuck in the walls, under bathtubs, and in appliances are common. It is critical for owners to review the area frequented by the ferrets carefully from floor level and make it completely safe.
Areas that cannot be adequately ferret proofed should be blocked off by a closed door or Plexiglas gate (ferrets will climb baby gates). Since they are fast, owners must ensure a system is in place to prevent escape when someone enters or exits the house. A ferret that leaves the house is likely a dead ferret.
Perhaps one of the most common, and potentially life threatening, behavior problems is their unique ability to creatively access any area they decide they want to go. Common sense is lacking in young ferrets and the need for exploration far exceeds the sense of danger. Owners must be constantly vigilant to stay one step ahead of the ferret on an unintentional suicide mission. This situation can be frustrating to the owner and deadly to the ferret. It is not acceptable to just consistently confine them to a cage; rather you must develop “ferret safe” areas in the house and provide adequate mental stimulation to entertain them.
Safety tip: Ferrets will do anything they can to find trouble.
Other Pets
Ferrets are predatory creatures, and small pets such as rodents and birds may be in jeopardy from the playful advances of a predator. Similarly, ferrets are petite and can easily be injured by family dogs. Cats may also provide a risk, but sometimes cats stalk ferrets and sometimes ferrets stalk cats.
Either way, the interaction must be closely monitored.
Diet
Diet is an important, and often overlooked, aspect of ferret care. They need a high protein, moderate to high fat, and low carbohydrate diet of high quality. It is critical for their health.
Ferrets are obligate carnivores, and as such, have specific nutrient needs. Unfortunately, ferrets also have strong preferences, and not always for what is best for them – and it can be difficult for owners to convert an adult ferret to an appropriate diet. Also unfortunate is that the higher quality ferret foods are expensive, leading many owners to feed a lower quality cat food. Although cats are also obligate carnivores, they can digest a higher carbohydrate load than is ideal for ferrets. Therefore, while ferrets can survive on cat food, a high-quality ferret kibble is preferable.
Protein requirements are high (32-38%), and they cannot properly digest vegetable proteins. In general, proteins from poultry meat/poultry by-products are considered the most nutritious. Secondary sources, such as meat meal, whole eggs, and liver meal may be included as well. Avoid vegetable proteins (soy, corn, cereal grains). Fish-based proteins result in exceptionally smelly stool and a greasy hair coat, and while they may be nutritious, they tend to be unpleasant for you.
At no time should diets containing dried fruits, vegetables, or seeds be fed to ferrets: not only do they have no nutritional benefit, they can cause intestinal obstructions.
Ferrets also have an unusually high need for fat in their diets (20-23%). Poultry should be the primary source of this fat, with little or none of it coming from vegetable sources (such as corn oil, lecithin, or vegetable oil). Similarly, beef tallow is not easily digested by them.
Ferrets have little use for carbohydrates and fiber. A high quality, simple carbohydrate (such as brewer’s rice or rice flour) is appropriate, but corn and wheat flours are not easily digested. Fiber levels should be at 2% or less; allowing the ferret to absorb more nutrients and eliminate less waste. Beet pulp is a common source of fiber for ferrets.
Taurine supplementation is necessary, and they may have a higher need for vitamin A than many of our traditional pet species.
Ferrets are about as good at getting treats out of their owners as Labrador retrievers are. They are completely unwilling to acknowledge that some of their favorite snacks simply are not good for them. Healthy treats that can be incorporated on a daily basis include small amounts of unseasoned lean meats and organ meats, cooked eggs, homemade turkey/salmon/beef jerky, insects (mealworms, earthworms, crickets, as you would feed a reptile), killed prey animals (small rats, mice, chicks), chicken/turkey baby food, fatty acid and vitamin supplements (Ferrettone, Furotone), and dental care treats (N-bone Ferret Chew Sticks and Zupreem Dental Sticks Ferret Treats).
Fleas and Heartworms
Only one flea preventive is available for use specifically for ferrets only: Advantage II for Ferrets. Anything else is off label, meaning it is treatment for a condition for which it has not been officially approved. Before this ferret-specific product came on the market, ferrets were given cat products.
Only one drug, Advantage Multi for Cats (imidacloprid and moxidectin), is approved to prevent heartworms in ferrets. No drugs are FDA-approved to treat heartworm disease in this species. Talk to your ferret veterinarian about the use of off-label drugs for treatment.
Grooming
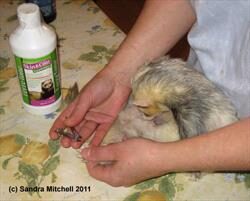
Perhaps the most important aspect of home care involves toenail trimming. Young ferrets have rapidly growing, sharp toenails. If not trimmed on a regular basis, these nails not only damage you and your furniture, but will also get snagged in bedding and toys. Many ferrets have broken toes and sometimes even self-amputated limbs with overgrown toenails.
As ferrets age, their nails generally grow more slowly and become thicker, so the risks lessen slightly. For young animals, however, nail trimming might be necessary on a weekly basis.As the animals age, it may be necessary to trim only every second or third week,
Nail trimming and ear cleaning can be done without a battle when you give the animal a small amount of either Furotone or Nutrical to lick off their belly. This magic “ferret crack” manages to distract them into complete compliance with no restraint needed. This allows most owners to easily trim nails as needed at home.
I prefer using the small, flat nippers many people use on their own nails; my technicians usually use the White style trimmers commonly used on cats. The nails are usually clear and the blood line easily visible, making trimming a routine and simple process.
Ferret ears also require regular grooming care. Many ferrets are prone to a lot of ear wax, which, if left alone, may result in inflammation. Although not all ferrets are bothered by ear wax, some benefit from regular ear cleaning. I clean ears gently with a small cotton swab moistened with a commercial ear cleaner safe for cats. Signs of a diseased ear include redness, pain, odor, pus, itchiness, etc. Not all ferrets need their ears cleaned, even though all ferrets appear to produce a lot of ear wax.
Dental Needs
Ferrets are prone to dental disease, and many are amenable to having their teeth brushed at home either with a commercial toothbrushing kit used in cats or with a gauze dipped in flavored commercial pet toothpaste.
Bathing
Many owners feel they need to bathe their ferret because of the smell. In reality, overbathing causes the ferret to release more coat oils, and generally will increase the smell. If a ferret has a strong smell, it is either being kept in a dirty cage, being fed a poor (fish based) diet, or has a health issue. Well cared for healthy ferrets have a minimal smell. In general, ferrets do not need to be bathed any more frequently than the average house cat. If necessary, a mild shampoo such as Johnson and Johnson natural baby shampoo is appropriate. Bathing should not be done more than monthly, if at all.
Many ferrets, however, tremendously enjoy simply playing in water or snow – and most owners will allow them that opportunity on a regular basis without the oil stripping effect of shampoos and chemicals. They will dry themselves by slithering through towels on the floor, thinking they have gotten away with something and created an awesome new game.
Often, well-meaning people describe rabbits as easy to keep because “they can be caged and don’t take up much space”. This idea has led to many rabbits being caged most of their lives with the distinct possibility of developing both physical and behavioral disorders. Bunnies have evolved to run, jump, and move about in large areas.
House rabbits should never be confined exclusively to their cage. Exercise, in addition to a healthy diet, is vital for your pet rabbit’s health.
To confine a rabbit exclusively to a cage can cause several problems:
Obesity – caused most often by a diet too high in calories coupled with a lack of exercise;
Pododermatitis – inflammation of the feet caused by sitting in a damp or dirty environment;
Poor bone density – rabbits that are continually confined to a small cage can exhibit marked thinning of the bones, which may lead to more easily broken bones when handling;
Poor muscle tone – if your rabbit can’t exercise, the muscles, including the heart, will be underdeveloped and weak;
Gastrointestinal and urinary function – a rabbit that sits all day in a cage with little exercise can develop abnormal elimination habits;
Behavioral problems – continuously caged rabbits can show a wide range of abnormal behaviors, including lethargy, aggression, continual chewing of the cage bars, chewing fur (obsessive grooming), and destruction of the entire contents of the cage.
A cage can be a home base for part of the day or can be opened all the time within an exercise area. The cage should allow your rabbit to stand up on its hind legs without hitting the top, provide a resting area, and have space for a litter box. It should be easy to clean and indestructible, so metal is the best choice. The floor should be solid but covered with soft padding, such as a foam mat covered with fleece blankets.
Keep the cage in a well-ventilated, cool area. Basements are often too damp, which can promote respiratory disease. If you must house your pet in a basement, use a dehumidifier and a fan to improve the air quality. The ideal temperature range for a rabbit is 60ﹾF to 70ﹾF.
If temperatures reach the mid-80ﹾFs and beyond, especially with high humidity, your rabbit could potentially suffer a fatal heat stroke. On hot days when air conditioning is unavailable, leave a plastic milk jug filled with frozen water in the cage to use as a portable air conditioner and consider using a fan.
Rabbits can be caged outdoors if provided with a shelter to protect them from rain, heat, and cold. Rabbits tolerate the cold far better than the heat, and can rapidly suffer from fatal heatstroke if the temperature is greater than 85ﹾF degrees.
Ensure your rabbit’s cage is secure from predators such as dogs, coyotes, and raccoons and kept clean so it won’t attract parasitic insects. In the winter, use straw or, ideally, hay bedding in the sheltered area for insulation and change the water bowl daily. Your pet can dehydrate rapidly if the water is frozen for even a day.
Exercise Areas
It is vital to your pet rabbit’s health to provide an exercise area where they can roam for a few hours daily. The easiest way to accomplish this is to use exercise fencing panels sold for dogs. Sometimes referred to as “x-pens”, these can be found at most pet stores. Buy fencing at least three feet high for small and medium rabbits and four feet high for giant breeds. These panels are easily assembled with metal pins and can be configured to any size or shape needed. The pen protects your bunny from furniture, electrical cords, and toxic materials.
The pen can also be used outside as a moveable enclosure to allow your pet access to grassy areas. Never leave a rabbit outside in a pen unsupervised or vulnerable to other animals. Large predatory birds are a concern when rabbits are not properly protected outside. Some rabbits may jump over or dig under the fence.
If you need to protect the floor under your rabbit’s cage indoors, you can use a sheet of no-wax flooring, available at most hardware stores. It can be easily cleaned and rolled up when not in use. The soft foam squares used on playroom floors work well if your bunny uses the areas around its cage as a play yard. Cover the area with fleece blankets for extra softness and to keep your bunny from nibbling on the foam.
Safe Spaces Are Bunny-Proof
Many rabbits live uncaged in the homes with their human families, roaming the house and playing at will, returning to their open cages for food and water. If you want to allow your rabbit liberty in your home, it must be bunny-proofed to keep them safe. Block all escape routes; cover or block access to electrical and computer cords and charging cables; cover furniture to protect it from your rabbit’s teeth and claws; remove access to toxic plants, rodenticides, insecticides, and other harmful materials.
Litter Boxes
Rabbits can be litter box trained relatively easily. When beginning training, confine your pet in a small area, either in a cage or a blocked-off section of the room, and place a litter box in the corner; try to pick the corner your pet has previously used for their toilet. Ensure the box’s sides are low enough so your pet can get in and out easily.
To encourage defecation, droppings in the litter box on top of hay can sometimes be helpful. Rabbits will not eat soled hay, so change the hay frequently and consider having a hay box on the side of the enclosure to allow access to unsoiled hay.
In exercise areas, provide one more litter box than the number of rabbits you have and put newspaper or plastic under the litter box to protect your floors from accidents.
Pelleted litter is the best for rabbits and is preferred over corncob, kitty litter, and wood shavings, which are considered toxic. Pelleted litter is non-toxic and digestible if eaten. It draws moisture away from the surface, keeping it drier, controls odor well, and can be composted. Do not use clay or clumping kitty litter, which, if eaten, can cause intestinal impacts. Many rabbit owners prefer the use of pine pellets.
Resting and Hiding Areas
The ancestors of pet rabbits would have spent a good part of their day in protected underground burrows. Pet rabbits retain the same need for a protected area where they feel safe and secure. Some rabbits are content to sit in a box full of hay, others like an enclosed box in which to hide. If your bunny seems to enjoy semi-enclosed safe spaces, try providing hiding places, such as untreated wicker or straw baskets, litter pans or other shallow boxes filled with hay, cardboard boxes with an entrance hole and the bottom removed, or large cardboard tubes.
Wire flooring in cages is not recommended, but most cages come with it. If your bunny’s cage has one, you can make a solid and comfortable resting area by using washable or disposable materials that are also absorbent. Some examples might be fake fleece (not long fur) found in fabric stores or absorbent baby blankets (not terry cloth towels). Do not use carpet squares as they are not absorbent, are abrasive to your bunny’s feet, and cannot be thoroughly cleaned. Carpet, if eaten, can cause abdominal obstruction.
Enrichment
Rabbits get a fair amount of mental exercise from their diet of grass hay and green foods, but additional toys are appreciated. Rabbits like to chew, so give them branches from untreated trees (dry the wood for at least a month to prevent any adverse reactions to the sap), wooden chew toys designed for birds, or unfinished, unpainted wicker or straw baskets.
Rabbits also enjoy things that move and can be chewed, such as empty paper towel rolls, small empty cardboard boxes, and small piles of shredded paper. Small, air-filled balls are also fun to nose around. Stacking-type toys made for young children are a safe choice and seem to be enjoyed by bunnies.
Toys can be made more interesting by hiding healthy treats inside empty toilet paper rolls and old tissue boxes. Stuff hay in your bunny’s favorite hiding area. Giving your rabbit a sense that they are foraging for food is an excellent mental activity.
Handling
Depending on how calm your pet is, there are several ways to pick up your rabbit. The main thing to remember is to always support the hindquarters to prevent serious spinal injuries. A rabbit’s backbones are fragile and can fracture if the hind legs are allowed to dangle, and if the rabbit then gives one strong kick. Unfortunately, these injuries are usually permanent and often result in euthanasia, so prevention is the best policy.
Never pick a rabbit up by their sensitive ears. It’s painful and unnecessary. The proper way to pick up your bunny is to grasp the loose skin over the shoulders or scoop them up under the chest for support before lifting your bunny from the floor.
When first learning to handle your pet, work near the floor so that if they jump out of your arms, there isn’t a chance of a fall.
Ask your veterinarian or an experienced rabbit handler about methods of handling rabbits. Some restraint methods are useful when your rabbit needs to be medicated. Wrapping your pet securely in a towel, often referred to as a “burrito”, is one easy method, and your veterinarian can instruct you on the proper procedure.
Your veterinarian is always a good source of information to help you keep your pet rabbit healthy, happy, and enriched.
Did you ask for a rabbit for Easter? Did you get one?
Read on for a fun (and perhaps not so fun) look at rabbit ownership.
Ask any rabbit fancier, and they will tell you what makes rabbits so great. These affectionate, high-spirited herbivores are full of mischief and games. Their amusing behavior, coupled with their quiet nature and convenient size, makes them wonderful house pets.
But as some unsuspecting Easter bunny recipients may soon discover, these feisty little lagomorphs can be a handful to house. In fact, their upkeep can be such a challenge that a handful of owners will call it quits and surrender their Easter pet to an animal shelter. To help prevent such a grave mistake, here are some facts and tips that a potential rabbit owner should consider.
Bunny-proof the House
To start, the first challenge most bunny owners face is that of protecting the house. Bunnies love to chew—on your plants, on your books, and especially on your electrical cords. It’s in their nature. Their wild counterparts spend most of the day foraging, which requires hours of chewing on often relatively low-calorie foods to get the nutrition they need. They browse a few leaves on one plant and then hop over to the next and search through the vegetation to get to the parts they want. In contrast, the typical house rabbit tends to get a concentrated pellet meal, which takes way less time to chew. As a result, bunnies have all that extra time on their hands and a high desire to chew.
An on-the-ball owner will provide chew toys and hay at all times to help fulfill this chewing desire. In addition to these precautions, you’ll need to bunny-proof the house. Make sure electrical cords are out of the way, and if you can’t elevate the cords put them in PVC piping.
Once you think the house is safe, you can start letting Bunny out, supervised at first. That way, you can see how well you have bunny-proofed. You never quite know what they will take an inkling to do. Some youngsters even chew and swallow carpet, which can lead to intestinal blockage, a problem that requires surgery.
It’s important that rabbits get enough exercise. Spending their entire day in a cage is not adequate any more than spending all your time in a room the size of a walk-in closet and with no T.V., radio, or internet! So, Bunny will need some playtime every day outside the cage.
Bunny Poop and Potty Training
Even before you give Bunny the run of the room or even the house, there are a few other issues to consider. Assuming you don’t like little green pellets decorating your floor, your bunny’s first lesson should be potty training. Limiting Bunny to the cage and adding a box filled with rabbit-safe litter plus samples of her No. Two often does the trick. Additionally, adding hay to the corner of the box can help entice them in. For the occasional bunny who likes to hang out in their own bathroom and poop in the cage, make the rest of the cage more comfortable so they’ll hang out there instead. Try placing a synthetic sheepskin rug in it.
Once you’re certain Bunny has the idea, you can let them out into a small play area. Be sure they still have easy access to the litter box, and add boxes as needed. By starting slowly, you’ll be able to increase the play area gradually and decrease the number of litter boxes.
An Interesting Fact About Rabbit Poop
By the way, since we’re talking about poop, you might want to know that rabbits regularly eat some of their poop. Rabbits are hindgut fermenters. That means their vegetable-digesting system occurs in the latter half of the gut. Rabbits don’t digest vegetable matter on their own. Food passes through the stomach and then is further digested, and the building blocks are absorbed from the intestines to the bloodstream. Animals can’t digest the coarse cell walls that make up vegetation. They have to rely on bacteria in their gut to ferment the products. Then, they digest the bacteria and all the material they’ve made.
Because this bacterial digestion system occurs well down the road in the mid intestines (primarily a portion called the cecum), a lot of the digested material is wasted and leaves the body through the poop. To recover this important source of nutrition, rabbits tend to poop the cecal pellets at night and then eat these so-called night feces.
Urine Marking and Aggression
Next, there’s the problem of urine. It’s hard to believe, but these cuddly creatures are unmistakably territorial. They’ll mark their area, and some will bite and scratch both two- and four-legged trespassers.
Getting Bunny spayed or neutered at five to six months old will eliminate most of the marking and can double or triple their life span by preventing fatal reproductive-tract cancers. Good socialization and rewarding appropriate behavior can fix the rest. Regular, short, gentle handling sessions where the rabbit is well supported can turn a ho-hum pet into a wonderful, sociable companion—one that can even learn to greet you on cue or perform simple tricks.
This handling should start before three months of age since the sensitive period for developing social bonds and learning to recognize that being handled, people, and other pets is safe occurs in the early weeks of life. Different people, including visitors, should handle bunnies so they learn that visitors are safe to be with, too. They will learn even faster if you give them treats to nibble on while you’re handling them and when putting them in new situations. Then, they will associate the handling and new situations with good things. If they are hungry but won’t eat, that indicates the situation is scary.
Medical Issues
Besides these behavioral aspects, rabbits require additional considerations. Rabbits require lots of care, possibly more than a cat or a dog. They have dietary needs that are more specific than a dog’s, and husbandry is such a major issue that if you’re not paying attention, problems can arise before you even have any idea.
Veterinarians commonly see problems of benign neglect. Owners usually aren’t purposely neglecting their rabbits, they just haven’t learned how to properly care for them.
Such problems include teeth so overgrown that Bunny can’t eat, urine burns on the tummy, and malnutrition. Additionally, because rabbits are prey animals, without thorough socialization, they stress easily and, like cats, hide their diseases for a long time. That means that when we finally realize they’re sick, they’re pretty far along.
To prevent problems from sneaking up on your bunny, examine them daily for physical problems and bring them in yearly for veterinary checkups.
By now, it’s clear that bunnies require unique care. And maybe an Easter bunny is not right for you. But for those owners who can meet their needs, bunnies can make unique companions.
Rabbits make intelligent, friendly, and quiet house pets. The average life span for a bunny is seven to 10 years, with records of up to 15 years of age reported. The following information is provided to help you enjoy a happy, healthy relationship with your little friend.
NOTE: The diet recommendations in this care sheet are directed towards the pet rabbit and not the production rabbit, such as those raised for meat or fur. The dietary requirement for rabbits in a production situation differs because more rapid than “normal” weight gain and body growth is desired.
Normal Rabbit Weight
What was considered a normal rabbit weight in the past has been an overweight rabbit. Obesity is a problem with rabbits that eat a diet too high in calories and don’t get enough exercise, enrichment, and proper housing. A healthy rabbit should be slim and sleek, and you able to feel the ribs just under the skin without a thick layer of fat. The hindquarters should not have any folds of skin covering or interfering with the digestive tract or urinary openings. The dewlaps in females should not interfere with grooming or eating. If you are in doubt about your rabbit’s proper weight, please consult your veterinarian.
Cecotropes
Rabbits are herbivores (plant eaters) with a marvelous gastrointestinal (GI) tract that can extract nutrients from various sources. Rabbits are meant to live on a diet composed of large quantities of grasses and leaves. They also graze on flowers and fruits that can be found at different times of the year.
Rabbits succeed at making the most out of the foods they eat, foods that many other animals cannot digest. One of the keys to their success is the production of cecotropes, which are a type of dropping that is eaten by the rabbit directly from the anus and then digested. These droppings are not made up of waste materials but instead are rich in organisms that have come from the area of the intestinal tract called the cecum. These organisms are packed with nutrients such as amino acids (the building blocks of proteins), fatty acids, and various vitamins. The cecotropes, including the organisms, must be eaten and digested for the rabbit to get these nutrients. In this way, rabbits can extract the maximum nutrients from low-energy food materials. They literally produce some of their own food.
Healthy rabbits will eat their cecotropes directly from the anus, and you won’t see these droppings in the cage. If a rabbit has a medical problem that prevents them from reaching the anus, then you may see cecotropes on the cage floor.
Cecotropes are elongated, greenish in color, coated in mucous, and have a strong odor. If a rabbit eats a diet too rich in nutrients, such as primarily commercial pellets, or a diet excessively high in fruit, a few cecotropes may be found in the cage. If you see many cecotropes in the cage, consult your veterinarian, as this is abnormal.
Hay
There are two basic types of hay available: grass and legume.
Rabbits are designed to live primarily on a diet of grass and leaves, and hay can provide a good portion of that diet.
Grass hay
Grass hay is the most important part of your rabbit’s diet and should always be available in their cage. Grass hay is appropriate for all ages of rabbits, starting at weaning, and is important for your rabbit’s health in many ways:
It is rich in nutrients such as vitamins, minerals, and proteins.
Provides “food” for the micro-organisms that make up the cecotropes.
Provides indigestible fiber that promotes healthy motility (movement of contents) of the intestinal tract.
Provides healthy chewing activity to promote proper wear of the teeth (a rabbit’s teeth grow continuously throughout life).
Chewing also provides healthy mental activity and a full feeling in the stomach, which decreases chewing inappropriate objects such as furniture and wallpaper.
Grass hays are made from timothy, meadow, oat, rye, barley, or Bermuda grasses. Try to feed mixed grass hay or provide two or more individual types. It is much preferable to feed a variety of grass hays if available. Grass hays are the healthiest and are rich in nutrients while providing the lower energy diet for a house rabbit. If you have a choice, choose sun-dried hay, which retains more nutrients than commercially dried hay.
Legume
Legume hay is made from alfalfa, clover, peas, beans, or peanuts. These types of hay are loaded with nutrients but have more calories, calcium, and protein than an adult house rabbit needs. Feeding only legume hay may lead to gastrointestinal and urinary disorders and obesity. If you mix legume hay with grass hay, your rabbit may only pick out the calorie-rich legume hay and thus overload themselves with calories, so mixing the two is not recommended.
Alfalfa
Alfalfa hay used as a treat is fine but shouldn’t be used as the routine hay source for the average adult house rabbit.
No Straw
Do NOT feed straw. Straw lacks most nutrients and will lead to serious nutritional deficiencies if it is a major part of your rabbit’s diet.
Sources for hay include veterinary clinics, horse barns, feed stores, pet stores, rabbit clubs, and many online stores.
If you buy from a feed store or horse barn, select hay that has not been on the top of the pile to prevent animal or bird-dropping contamination.
Buy hay that smells fresh; never buy damp, moldy, or old hay.
Store hay in an open bag in a dry place with good air circulation. Hay can be given to your pet in various ways, including in a hay rack attached to the side of the cage, in a box or basket within the cage or exercise area, or even placed in the litter box.
Rabbits often pass stools when eating, and placing some hay in the litter box can help with litter box training. They will not eat soiled hay, so you need not worry about sanitation. Always keep hay in the cage or exercise area and replenish as needed. You can also stuff hay into toilet paper rolls and other hiding areas as a fun way to increase mental exercise associated with foraging for food. Providing a regular source of grass hay is a major key in preventing many diseases in a pet rabbit.
A Word About Angora Rabbits
Angora rabbits have diet requirements different from other rabbit breeds. While some alfalfa or legume hay is recommended, consult your veterinarian about the best complete diet for your Angora.
Green Foods
Green foods are the next most important food in your rabbit’s diet. Green foods provide all the same benefits listed for hay. They also contain a wider variety of micronutrients and provide water in the diet, as some rabbits do not always drink as much as they should. Feeding green foods forces the rabbit to take in liquids and thus helps promote healthy GI, kidney, and bladder function. You will notice that if you feed your rabbit a lot of green foods, they may drink less water, which is normal.
Feeding your rabbit a diet comprised primarily of green foods is never appropriate. The green foods in grocery stores do not have enough concentrated calories to sustain a rabbit’s normal body weight when used as the primary food source. In the wild a rabbit would eat dried grasses and tree and bush leaves to obtain more calories. Greens are an important addition to the diet but should never be the total diet.
Start your rabbit on hay first if your rabbit has never eaten green foods before. This will help to make the appropriate changes in the flora (the stuff in your rabbit’s tummy made from the greens they eat) of the gastrointestinal (GI) tract, including improving movement and production of cecotropes. In this way, you can avoid the problem of soft stools that are occasionally seen when you give greens to a rabbit that has never eaten hay or greens. This is not usually a dangerous disease; it is the rabbit’s intestinal tract changing from sluggish to more active. However, these soft stools can be messy, so changing to hay first for a month at a minimum will avoid this problem. Greens are appropriate for any rabbit of any age if the rabbit is already eating hay daily, as mentioned above.
Some resources, such as rabbit breeders, books, or websites, advise against feeding greens to rabbits under six months of age. Your veterinarian is the best informational source for feeding guidelines for your rabbit.
When selecting and using green foods, follow these recommendations:
Buy (or grow) organic if possible.
Wash any green foods first.
Make sure your rabbit is eating hay well first.
Introduce greens a little at a time over several days and watch the stools for any change.
Feeding a variety of at least three green foods daily provides a wider range of micronutrients and mental stimulation for your rabbit.
Feed a minimum of about one packed cup of green foods per two pounds of body weight at least once a day, or divide this amount into two daily feedings.
Occasionally, you may have a situation where a certain green food causes a soft stool. You will know if this is the case within 12 hours of feeding the offending food. If you are feeding a variety of greens and unsure which one is causing the problem, feed only one green food every 48 hours until the offending food is identified, then remove it from the diet. This is not usually dangerous, but it can be messy, and there is no need to give food that is causing a problem. If this occurs, you should consult with your veterinarian.
There are many green foods that you can offer your rabbit. This would include grass you grow in your yard but should be fed only if no pesticides or other chemicals have been used. Consider growing a patch of grass for your bunnies. If not treated with chemicals, dandelions are an excellent source of nutrition.
The darker green a food is, the higher the nutritional value. This is why, for instance, iceberg lettuce is not recommended. It is not dangerous but is low in nutritional content. You can use packages of mixed salad greens if they contain dark-colored greens and are not comprised primarily of iceberg lettuce or romaine lettuce. Please, no salad dressing.
Green foods you might consider:
Baby greens Bok Choy Borage Basil Broccoli (leaves and top) Brussels sprouts Cabbage (red, green, Chinese) Carrot/beet tops Celery (leaves are good) Chickory Collard greens Dandelion greens and flowers Dock
Wild rabbits would have access to additional foods such as fruits, vegetables, and flowers depending on the time of year. These should only be a minority of the diet; feeding these treats in limited quantities is recommended. Some rabbits like these foods so well that they will eat them to the exclusion of all others, thereby creating a potential for health problems.
*TIP
Find at least one food in this list that your rabbit likes and feed a small amount daily to check on how good your rabbit’s appetite is. If your rabbit will not eat their treat food, then there may be other problems brewing and you need to keep a close eye on your pet for health problems.
These treat foods are far healthier (and less expensive) than commercial treat foods sold for rabbits. Commercial treat foods are loaded with starch and fat and, if fed in quantity, can cause serious health problems, so they are best avoided. Read the label on any treat food to make sure the ingredients are not primarily based on grains. Sticking to natural and healthy treats for your rabbit is a better alternative.
For treat foods, follow the same guidelines listed above for selecting and using green foods except for the amount. You can feed your rabbit one teaspoon per two pounds of body weight per week of any combination of the foods below. Foods from this list can be fed daily, and you may even wish to use them as part of a reward or training system
Apple Bean or alfalfa sprouts Blackberries Blueberries Cactus fruit Carrots Cherries Cranberries Green or red bell peppers Kiwi Fruit
Mango Melons Papaya Pea pods (flat, NO peas) Peach Pear Pineapple Raspberries Squash
Edible flowers from the garden (organically grown and not from a florist), such as roses, nasturtiums, daylilies, pansies, and snapdragons
Dried fruit can also be used, but since it is so concentrated, use only one-third of the amount as fresh.
Forbidden Foods
A diet of grass hay and green foods with small amounts of fruits and vegetables contains all the nutrition necessary for your pet rabbit. Unfortunately, there are many commercial treat foods sold for rabbits that contain high levels of starch and fat. In addition, some people still feel it is necessary to feed rabbits high-starch foods such as cereals, cakes, and cookies.
Although a pet rabbit can eat small amounts of starchy or fatty foods without ill effects, the problem is that people often feed excess amounts because the rabbits eat these foods so greedily. It is recommended to completely avoid high starch and/or fat foods for your rabbit. This way, you will avoid any potential problems these foods can cause, including obesity and serious GI disease. It is always easier to prevent than to treat a disease.
Examples of high-fat and/or starch foods to avoid include:
BreadsCerealsChocolateCornNutsOats
PeasRefined sugarSeedsWheatAny other grains not listed
Commercial Rabbit Pellets
Rabbit pellets should generally only comprise a small portion of your pet rabbit’s diet. There are much healthier commercial rabbit pellets available now than 20 or more years ago. Then, all the pellets were alfalfa and grain-based, and although they successfully produced fast-growing rabbits that put on weight quickly, they caused several serious problems for pet rabbits.
Rabbits should be fed uniformly extruded pellets, and pellet mixtures should be avoided. Rabbits will always choose to eat the tasty parts, leaving behind the nutritious extruded pellets
When a concentrated, uniform food source is fed to the exclusion of anything else in the diet, problems can occur:
High-calorie content can lead to obesity. It’s easy to overfeed because the rabbit is always acting “hungry.” Unfortunately, the concentrated and small form of the pellets does not lead to a feeling of fullness that a diet based on grass hay can provide. Even though rabbits should eat according to their caloric needs, in captivity with boredom, they will overeat pellets if they are provided free choice.
Low, indigestible fiber content can lead to a sluggish GI tract and eventually more serious GI disease, including ileus or dysbiosis (which means changes or imbalances in gut bacteria).
Doesn’t promote normal tooth wear due to the concentrated nature of the food – a couple of chews and the food is pulverized instead of the much longer chewing time to break down hay or greens.
Lack of sufficient chewing activity and a “full feeling” in the stomach due to the concentrated nature of the food may lead to behavioral problems, such as inappropriate or excessive chewing on furniture, plants, and floorboards. This could be likened to a sense of boredom. Rabbits in the wild spend much of their day eating, and pellets can be eaten in a few minutes.
The concentrated, dry nature of pellets may not promote normal water intake, resulting in potential urinary tract diseases such as “toothpaste” or sludgy urine. A rabbit’s natural diet would not be this consistently low in moisture.
The recommendation for feeding pellets would be to comprise 10% of the healthy rabbit’s diet and maximally no more than 20%. Sometimes, it may be necessary to feed a higher amount for these reasons:
To implement weight gain most often related to a debilitating illness such as end-stage dental disease.
When unable to feed a varied diet of good-quality grass hay and a variety of green foods, pellets will help to cover some of the trace nutrients that might be missed in a restricted diet.
When selecting a pellet, look for:
18% or higher in fiber
2.5% or lower in fat
16% or less in protein
1.0 % or less in calcium
Do not buy pellet mixes containing seeds, dried fruits, or nuts
Buy pellets based on grass hays (timothy, orchard grass, brome, etc.), not alfalfa hay (your veterinarian will advise you if an alfalfa-based pellet is needed for situations in ill rabbits where weight gain may be needed)
A recommended amount of pellets for healthy rabbits, other than giant breeds, is approximately ¼ cups per four lbs. of body weight daily. This can be divided and fed twice a day or fed once daily. Pellets can even be fed individually and used in a training program. For dwarf bunnies, a 1/8 cup daily maximum is recommended. The amount should be less if your rabbit has medical issues.
Eliminating pellets from the diet may be preferable for rabbits with chronic GI problems or excessive weight issues.
Water
Water should always be available and changed daily. Dirty water containers can be a breeding ground for bacteria. Use either a water bottle or a heavy bowl that is weighted or secured to the side of the cage so it does not tip over. Research has shown that most rabbits prefer to drink from a bowl, so a bowl should always be offered. Some rabbits are not used to a bowl and need water from a bottle. Do not use medications or vitamins in the water because your rabbit may not drink if the taste or color is altered. Water consumption may be minimal if your rabbit eats enough greens.
Vitamins/Lactobacillus/Enzymes
Vitamins are unnecessary for a healthy rabbit. Rabbits will obtain all the vitamins they need from their cecotropes, grass hay, green foods, and small amounts of pellets. The misuse of vitamins can cause serious disease. Your veterinarian may prescribe vitamin therapy if your rabbit becomes ill, particularly if they cannot eat the cecotropes. Do not use supplemental vitamins in a healthy pet. In addition, rabbits on a healthy diet do not need a salt or mineral block; their use has been associated with severe disease.
Lactobacillus or acidophilus are bacteria found in the GI tracts of several species.
Past recommendations were to feed rabbits yogurt (which contains active cultures of these organisms) to improve their GI tract health. However, there is no benefit to feeding these bacteria to rabbits because Lactobacillus does not hold an important place in the rabbit GI tract, and adult rabbits may not adequately digest dairy products.
Other products called probiotics, which contain bacteria more specific to the rabbit GI tract, are available, but their benefits are still controversial. A rabbit on a healthy diet of grass, hay, and green foods should be able to maintain a normal population of bacteria without additional supplementation. Routine use of probiotics in rabbits is not recommended.
Some older texts recommend feeding rabbits digestive enzymes, such as pineapple juice, to help dissolve hairballs. This does not benefit the rabbit because such products do not dissolve hair.
It is always best to consult with your veterinarian if you have questions or if you need feeding recommendations for your pet rabbit or rabbits.
Although veterinarians know a great deal about dilated cardiomyopathy (DCM) in dogs because it is so common in that species, they don’t know as much about heart conditions in guinea pigs. There simply hasn’t been much heart research done for them because there isn’t nearly as much funding, but there is enough to provide more than educated guesses. Also, many diagnostic efforts in other small mammal species can be used for guinea pigs.
While there are several kinds of cardiomyopathy, at this time, it seems that guinea pigs only get DCM.
DCM is a disease in which the heart muscle weakens and cannot pump normally. As we and all mammals have four chambers, or atria and ventricles, in our hearts, so do guinea pigs. They may have issues with valves, the anatomical parts of the heart that let blood flow in the right direction through these chambers. Sometimes these valves can stop working properly over time, or there may be other issues with the heart, causing it not to pump as well as it should. This can create a cascade of other effects in which the heart enlarges and one or more heart valves leak, usually resulting in congestive heart failure.
Guinea pigs showing signs of respiratory distress should always be evaluated for heart disease. Respiratory distress may look like open-mouth breathing, panting (moving the chest and abdomen drastically while breathing, or coughing).
Signs of DCM in guinea pigs may include:
a “hooting” vocalization;
labored breathing;
reduced activity and lethargy;
cough or wheezing;
chronic upper respiratory infections;
fluid in the lungs;
loss of appetite and weight loss;
malocclusion (teeth that have not come in normally);
enlarged heart is seen on an X-ray;
ear margins may become necrotic from poor circulation (tissue death on pink ears appears as black marins, on black ears as white margins);
bluish or pale mucous membrane color;
difficulty coming around after being put under anesthesia; and
deep sleeping, easy to pick up (does not run away).
We don’t really know why guinea pigs get DCM, and no one knows how much diet and genetics play into it. Some guinea pig owners report to their veterinarian that heart problems can run in families, so genetics likely plays some part.
Enlarged hearts are not uncommon in guinea pigs and have several causes. For hearts that are simply enlarged, X-rays are usually enough for diagnosis, but that is not quite enough for DCM.
For DCM, a thorough examination and history are always necessary to rule out other serious medical conditions, such as sinus infections, tumors, and dental disease. Your veterinarian will listen to your pig’s heart, using a stethoscope, to see if there are any unusual sounds, observe the respiratory rate, and look at the gums as pale or bluish (cyanotic) gums signify poor blood circulation. To diagnose heart conditions, X-rays, electrocardiograms that record the heart’s electrical signals, and ultrasounds are used. Guinea pigs are usually anesthetized for the electrocardiogram.
If your clinic does not have the right diagnostic equipment in the right size, your veterinarian may refer you to a facility that does.
Heart disease is not curable but only managed. Overall, the prognosis for guinea pigs with dilated cardiomyopathy is poor, and many do not survive for more than three months after diagnosis. The enzyme angiotensin II constricts blood vessels, reducing blood flow, so a type of medication called an ACE inhibitor (angiotensin-converting enzyme) is used for mild cases of DCM, often combined with diuretics that cause water loss, lessening pressure on the fluid-filled lungs. These two drugs seem to be safe and effective in guinea pigs. DCM typically ends in heart failure, and these drugs normally slow down the inevitable. Your guinea pig may need to be re-examined at certain intervals, and higher doses or additional medications at some point may be necessary as well.
As always, discuss your options with your veterinarian to decide what may be best for your pet.
Requires a large amount of space and cool temperatures
Nocturnal
Destructive to property
Generally cannot be housetrained
Chinchillas are playful and intelligent pets, but they are not suited for all households. Although they are social and interactive, they are also messy and destructive. They make a significant mess when allowed out of the cage. Chinchillas are extremely active and need a significant amount of out of cage time and exercise. In an ideal world, they would be kept uncaged, but their penchant for chewing everything within reach and defecating anywhere they wish prevents that in most households. Unfortunately, they are intelligent, social, and active, and therefore not well suited for cage life. Fortunately, they are reasonably hardy animals and if properly fed and cared for, do not develop a large array of serious medical concerns.
Proper husbandry prevents many of the common medical issues. The vast majority of diseases seen by veterinarians in these friendly, appealing pets relate directly to poor husbandry. Although somewhat expensive, the adorable face and soft fur can often lead to impulse purchases, without an owner realizing the extent of the care required to keep them healthy. This, combined with the over-marketing of foods not designed for their intestinal tract can lead to significant health problems over their long life span. Being educated about what these pets need can go a long way towards improving their overall wellbeing.
Chinchillas are native to the Andes Mountains of South America. They dwell primarily at high altitudes, and are currently only found to exist in the wild in Chile. They are named after the Chincha people of the Andes, who once wore their thick fur, but unfortunately, overhunting has driven the wild chinchilla to near extinction. Most chinchillas used today in the fur industry are farm-raised.
In their natural environment, chinchillas live in large groups hidden in burrows and crevices. They are prey for a variety of animals (birds, snakes, and wild omnivores such as canines and skunks) and therefore have retained the skittish nature of prey species. They are able to jump as high as 6 feet, and will defend themselves by spraying urine or allowing large patches of fur to fall out if bitten (“fur slip”). This can be important when you take your chin to the veterinarian, where chinchillas may feel threatened and release fur; sometimes that is a surprise to a new owner. Their fine bones are also delicate, and fractures may inadvertently occur during restraint. Many veterinarians prefer to examine chinchillas from within the confines of a small hand towel wrapped around the it to keep the delicate animal accessible but free from injury.
Diet
The primary diet in the wild is high in fiber, and includes plant leaves, stems, bark, wild fruits, and small insects. This is a far cry from the most common, yet unbalanced, modern diet of pellets for the pet chinchilla. This natural high-fiber fare promotes health throughout the digestive tract, starting with the continuously growing teeth and ending with the stool, which is commonly eaten and re-processed. Calling a chinchilla “a digestive tract covered in fur” would be a reasonable description, and it is imperative to feed them adequately to maintain health.
Lively and entertaining, these delightful little creatures do make wonderful pets in households with a high tolerance for messes and destruction. They are likely not appropriate for houses with small children or predator-type animals, unless the interactions are closely monitored to prevent injury to the chinchilla.
They are one of the longest-lived domestic rodents, with life expectancies topping 12 years when properly housed.
Husbandry
Caging
Chinchillas are inquisitive, active, and intelligent. They require a startlingly large amount of space, particularly if they are caged for long periods of time. A large 2-story ferret cage (6 ft X 6 ft X 4 ft) would appropriately house one to two chinchillas. The larger the number of pets, the more space they will require.
Although many owners prefer a wire mesh cage to allow droppings to pass through, this can lead to injury should a foot or leg become entrapped in the wire. Plastic bottom cages can also be problematic because chinchillas will commonly chew through them. Additionally, the urine tends to stain plastic, and is difficult to clean. Most chinchillas are not readily trained to a litter box and tend to urinate and defecate where they wish. For many animals, the best solution is a wire cage with the bottom covered with a thick layer of hay. In this manner, it serves a dual purpose of a snack and soft bedding to protect the feet of the animals. The bedding will need to be thick and protective, absorbent as possible, and digestible if eaten. Regardless of bedding chosen, the cage will need regular cleaning either daily or at least every other day.
Enrichment
The cage should be outfitted with plenty of things to keep the intelligent chinchilla mind and large teeth busy. Ledge shelves to perch on, cardboard boxes to hide in and eat, and chewing toys are all important. Since chinchillas are so quick to destroy their chew toys, it is hard financially to keep them supplied from the local pet store. A good choice is safe wood trees that have not been sprayed with pesticides, and branches from apple and other fruit trees, non-resinous pine, and beech. Although maple is sometimes recommended for chewing, it’s not a good idea as chinchillas can develop a severe case of blood in their urine after eating dried maple leaves.
Oxbow makes a series of edible, safe, nutritious toys, including hay mats, tubes, and houses. These tend to be popular and safe, although over time, can prove expensive. Chinchillas do not need salt or mineral blocks if they are being fed a proper balanced diet.
Other inexpensive chew toys include deer antler and bones, which can be purchased inexpensively in bulk from wildlife rehabilitation facilities.
Many of the chew toys in pet stores are treated wood, expensive, and may only have a life expectancy of hours once they enter the chinchilla’s cage.
Chinchillas have a high energy level, and equipping the cage with an oversized wheel designed specifically for chinchilla use will provide endless hours of entertainment, exercise, and all-out fun. There are several different varieties available, and some chins do not take to them instinctively but have to be taught how to use them, but once they have caught on, it can be difficult to pry them out of their wheels. Chinchillas are primarily nocturnal, so it is particularly helpful to purchase a quiet wheel in order to maintain the sanity of the people in the house. Although more expensive, it certainly is worth a few extra dollars to prevent a wheel from squeaking at 2 a.m.
Chinchillas are somewhat high strung, and do not do well in congested and busy areas of the house. Additionally, they are largely nocturnal, and their noisy night time play will likely disrupt their sleeping humans.
They are extremely heat sensitive. They should not be housed near a heat source or window. In fact, a chinchilla exposed to over 75°F or in a high humidity environment can experience heat stroke. An underground basement where it stays cool year round is good, and it’s is out of way of day to day household operations but has easy access for playtime. Many people add strips of slate or quartz into the cages for chinchillas to sit on as a “cool spot” during the warmest part of the year.
Adding warmth, humidity, and stress is a recipe for a chinchilla disaster, and owners should carefully choose their cage settings with this in mind.
Dust Bath
Because of the extremely dense hair coat, chinchillas should not be bathed with water. Dampness can predispose them to fungal infections since they take a long time to dry. They enjoy dust bathing on a regular basis. Commercial bath formulas made of volcanic ash are available, as are “bath houses” that help to contain some of the dusty mess. Other people like to use cornstarch in a shallow dish or crock. Most chins really love to bathe, and it is entertaining to set out the bath and step back and watch the spin cycle! Some reports recommend limiting bathing to a few days a week to prevent eye and respiratory irritations; however, many chinchillas are allowed to bathe whenever they wish and have no problems.
Several dust formulations are available on the market. Choose one that is reasonably scent free with fine particles that will easily penetrate the thick coat. Use products that only contain volcanic ash or pumice dust and avoid unnecessary additives. The bathing area will also need to have regular cleaning since many chinchillas will urinate and defecate in their bathtub. (Remember, they are not exactly the cleanest of creatures to have in the house.)
If males and females are to be housed together, precautions are indicated, which will be discussed below.
Social Structure
Chinchillas are naturally a herd animal, and do much better in small groups than in solo housing. Unfortunately, however, female chinchillas do tend to be aggressive towards male chinchillas and can cause significant injury and even death. For this reason, many people prefer to have “single sex” groupings of chinchillas. One way around the issue is to divide the living quarters with a barrier and a small hole in the barrier. The male, being much smaller than the female, can cross the barrier to spend time with the female but also has the option to retreat to an area that the significantly larger female cannot access. Chinchillas are reasonably prolific, however, and if this option is chosen, surgical sterilization should certainly be considered. Small groupings of single sex animals are often also quite compatible and may be easier for owners to maintain.
Nutritional Requirements
Proper husbandry goes a long way to extending their life expectancy. Chinchillas are the Labrador retrievers of the rodent world. They will beg and plead themselves into all kinds of snacks that are not necessarily in their best interest. Similarly, they will eat vast quantities of food and overwhelm their intestinal tract. The average chinchilla, left to its own devices, would consume massive amounts of fruits, sweetened yogurt droplets, seeded/nut treats, and pellets, none of which relate back to the natural diet of a high fiber, low sugar, low protein combination.
Similar to rabbits and other herbivores, chinchillas are basically one giant intestinal tract with ears. From nose to tail, all of the internal organs are squeezed into corners of the body by the GI tract. They are designed to eat high fiber materials with a low nutritional content, and are programmed to spend a tremendous part of the day foraging for food. This combines with the anatomic reality of teeth that continue to grow throughout life, and the animal needs to eat a high fiber, low digestibility food. This is at complete opposite extremes with what is currently marketed in our pet stores of “chinchilla pellets” and “chinchilla treats” that are made up primarily of sugars.
A well-balanced diet is composed of a small amount (approximately 1 tablespoon per animal) of high-quality chinchilla pellets (such as Oxbow or Zupreem). These pellets should contain no dried fruits, vegetables, seeds or nuts.
The bulk of the diet should be made up of free-choice, high-quality sun-dried hay. Companies such as Oxbow produce a variety of different flavors, which can be rotated to provide variety and environmental enrichment. In general, any flavor of high-quality hay is appropriate, but alfalfa hay should be fed in small quantities, if at all. It is high in calcium and may be too rich for the chin’s intestinal tract. Some green leafy vegetables such as romaine, kale, endive, escarole, and spinach can also be offered.
Chinchillas will beg for, and eat, almost anything that is sweet, loaded with carbohydrates, and is bad for them. Unfortunately, these foods can upset the bacterial flora of the intestinal tract and can result in digestive upsets, bloat, diarrhea, and death. Diabetes is being diagnosed with increasing frequency in chinchillas, and many clinicians feel that improper diet may be the root cause of this, as well. Treats should be limited to two raisin-sized treats per animal per 24 hours. Safe snacks include raisins, rose hips, apple, Cheerios, dates, and limited amounts of other fruits.
Water is an essential nutrient for chinchillas, just like all species. However, once again, the sharp teeth of the chinchilla can cause problems with their water supply. Although most learn quickly to use a water sipper-style bottle, they will commonly chew the plastic variety and “pop” them. Glass bottles are generally better for chinchillas. Many do like to drink out of crocks as well. If using a crock, owners should monitor the chinchilla’s belly. If it is becoming moist, fungal infections may set in; and a change to a water bottle may be indicated.
Appropriateness as Pets
Although chinchillas are lovely animals, they are not necessarily appropriate for all households.
Good chinchilla owners must be able to provide them a significant amount of quiet, chew-safe space, out of cage exercise time, and a carefully balanced diet to ensure dental as well as gastrointestinal health. While chinchillas are reasonably hardy creatures, their health presuppose good husbandry and nutrition. Pet stores generally do a poor job of educating owners, leaving the responsibility to veterinarians. Sadly, veterinarians are often not consulted until the animal falls ill from a preventable disease.